Craving that perfectly crispy gluten free chicken parmesan that rivals your favorite Italian restaurant? You’re not alone! Surprisingly, this gluten-free version will “rival anything you can get in a restaurant”, without the gluten or the disappointment.
I’ve perfected this gluten free chicken parmesan recipe after years of testing, discovering that the secret lies in using the right ingredients and techniques. The gluten-free panko bread crumbs create “the perfect layer of crunch without making it simple, like a heavy meal”. Additionally, these breaded cutlets turn out “so tender and juicy that you can make them up to 3 days ahead of time”, making this dish perfect for busy weeknights.
What makes this recipe special? Actually, it’s all about the breading. Whether using panko, almond flour, or your favorite gluten-free crackers, we’ll show you how to achieve that golden, crispy exterior while keeping the chicken perfectly moist. For best results, “an instant-read thermometer inserted into the center should read at least 165°F” – just one of many professional tips we’ll share.
Ready to create a gluten-free classic that tastes “just like the old-school original”? Let’s get cooking!
Essential Ingredients for Crispy Gluten-Free Chicken Parmesan

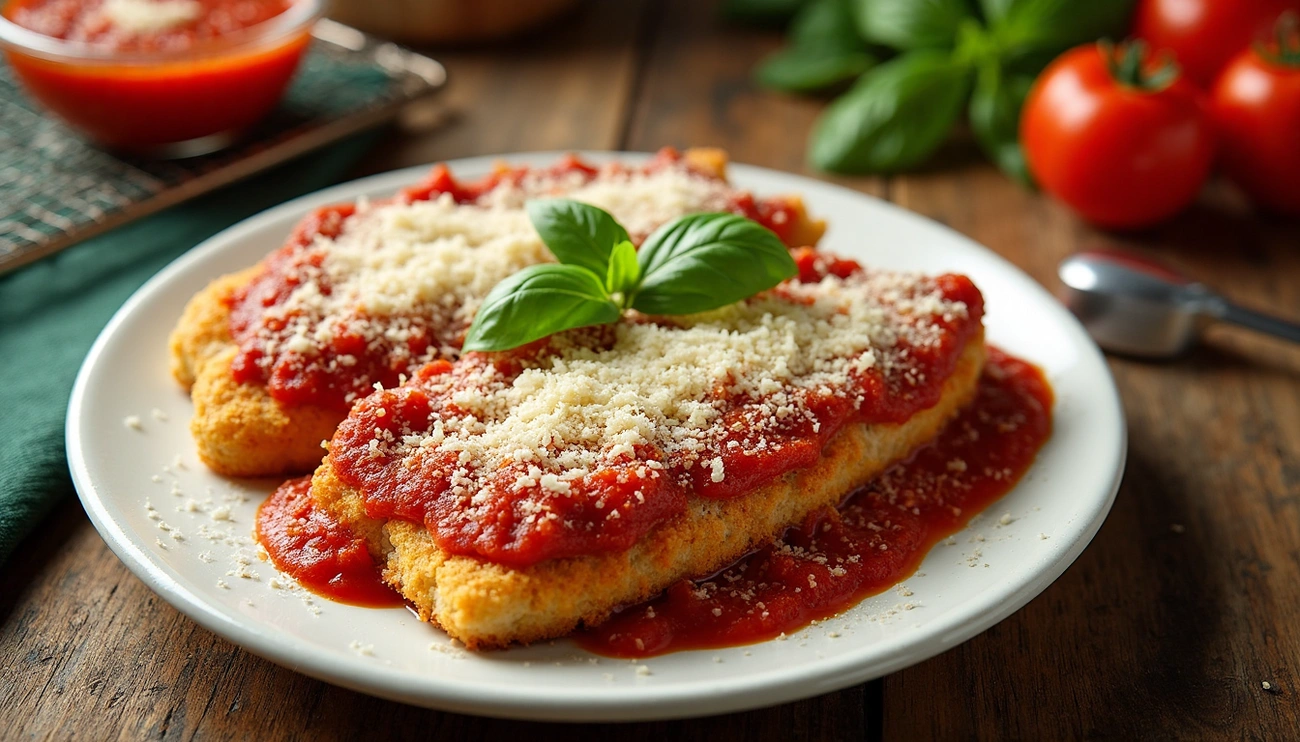
Image Source: Low Carb Hoser –
The foundation of an exceptional gluten free chicken parmesan begins with selecting premium ingredients. Let’s explore each component that contributes to that restaurant-quality crispiness and flavor.
Choosing the right chicken cuts
For the best gluten free chicken parmesan, boneless skinless chicken breasts are the gold standard. They provide a lean protein base that cooks evenly and holds breading perfectly. I recommend using high-quality chicken breasts to ensure the best flavor and texture. Furthermore, thin-sliced cutlets work particularly well—you can either purchase pre-cut breast cutlets or create your own by butterflying regular chicken breasts and halving them.
To achieve even cooking, pound your chicken to approximately ¼-inch thickness. This uniform thickness ensures the chicken cooks through at the same rate as the breading crisps. Consequently, you’ll avoid the common problem of overcooked exteriors with undercooked centers.
Best gluten-free breadcrumbs and panko
The secret to that coveted crunch lies in your breadcrumb selection. Gluten-free panko breadcrumbs create the most authentic crispy coating. Based on extensive testing, here are the top performers:
- Kikkoman gluten-free panko style coating – offers large, consistent flakes closest to traditional panko
- Ian’s gluten-free panko breadcrumbs – good option though sometimes less consistent in size
- 4C gluten-free panko breadcrumbs – well-priced with good crispiness
One professional tip: since gluten-free panko tends to be paler than regular breadcrumbs, toast them on a sheet pan before using to jumpstart the browning process. This simple step creates that golden-brown finish we associate with restaurant-quality dishes.
Recommended gluten-free flour blends
The flour component forms the foundation of your breading system. Bob’s Red Mill 1:1 Baking Flour performs exceptionally well in this recipe. Pillsbury gluten-free flour is another excellent choice, containing xanthan gum and starches that help replace the elasticity of gluten.
For measuring gluten-free flour, always use dry ingredient measuring cups—not liquid ones. I employ the “spoon and level” method: spooning flour into the measuring cup, then leveling it with a knife. This prevents packing too much flour, which would create a heavy coating.
Adding cornstarch to your flour mixture creates extra crispiness. A ratio of approximately ¼ cup cornstarch to ½ cup flour yields that perfect light yet crunchy exterior.
Cheese options: mozzarella and parmesan
The cheese selection dramatically impacts both flavor and texture. For mozzarella, whole milk varieties melt beautifully. Shred your own from a block rather than using pre-packaged shredded cheese—pre-shredded options contain anti-caking agents that prevent proper melting.
For parmesan, freshly grated Parmigiano-Reggiano provides the most authentic flavor. Many recipes call for approximately ¾ cup (about 2 ounces) of shredded parmesan in the coating mixture.
If you’re dairy-sensitive, several brands offer excellent alternatives. Violife dairy-free mozzarella shreds and Follow Your Heart dairy-free parmesan make delicious substitutes that still provide that essential cheesy element.
Sauce selection: homemade vs store-bought
While homemade sauce offers superior flavor, quality store-bought marinara can save considerable time. Rao’s homemade marinara sauce receives frequent mentions as a preferred option, as does Primal Kitchen marinara.
When using jarred sauce, taste before using and adjust seasoning if needed. Adding a teaspoon of salt or some Italian seasoning can elevate store-bought varieties. If the sauce tastes too tart, a half teaspoon of sugar balances the acidity.
A key technique: instead of covering the chicken with sauce (which creates sogginess), place the breaded chicken on top of a bed of sauce. This maintains that coveted crispiness while still providing rich tomato flavor.
Step-by-Step Preparation Guide

Image Source: Chef Janet
The perfect gluten free chicken parmesan requires careful preparation techniques to achieve that restaurant-quality crispiness. With the right approach, your homemade version will surpass any restaurant offering. Let me walk you through each crucial preparation step.
Pound and season the chicken
Firstly, prepare your chicken breasts by placing them between two sheets of plastic wrap or resealable freezer bags on a solid, level surface. Using a meat mallet (or alternatively, a rolling pin or heavy saucepan), pound the chicken to an even thickness of about ¼ to ½ inch. This uniform thickness ensures even cooking throughout and tenderizes the meat.
After pounding, pat the chicken cutlets dry with paper towels. This step is essential as moisture prevents proper breading adhesion. Subsequently, season both sides thoroughly with salt and pepper. For enhanced flavor, consider using a pre-mixed seasoning blend containing garlic, Italian herbs, salt, and pepper.
Prior to moving forward, let the seasoned chicken rest briefly. This allows the seasonings to penetrate the meat, creating deeper flavor throughout each bite.
Set up your dredging station
Creating an efficient dredging station is essential for smooth preparation. You’ll need three shallow dishes or bowls arranged in order of use. Pie plates or cake pans work perfectly for this purpose.
In the first dish, combine your gluten-free flour with half of your seasoning blend, salt, and pepper. In the second dish, whisk eggs until frothy – some recipes recommend adding a tablespoon of water or milk to create a smoother egg wash. For the third dish, mix your gluten-free breadcrumbs with remaining seasonings and grated parmesan cheese.
Essentially, this three-step station creates the foundation for perfect breading. Moreover, to minimize mess, designate separate utensils for each station – one fork or tongs per dish.
Coat the chicken properly for crispiness
The dredging technique directly impacts your final result. Begin by coating each chicken cutlet completely in the flour mixture, gently shaking off any excess. The flour creates a base that helps the egg mixture adhere properly.
Next, dip the floured chicken into the egg mixture, ensuring every surface is covered. Let excess egg drip off before moving to the final station. This prevents a gummy layer between the chicken and breadcrumbs.
Finally, press the chicken firmly into the breadcrumb mixture, coating both sides completely. Pat the breadcrumbs into the chicken to ensure they adhere well. This pressing technique is crucial for creating that thick, even coating that results in maximum crispiness.
For optimal results, allow the breaded chicken to rest for 10-15 minutes before cooking. This resting period allows the coating to adhere properly to the chicken, preventing it from falling off during cooking.
Remember, handling the breaded chicken minimally helps maintain coating integrity. Use tongs when transferring the breaded cutlets to your cooking surface to avoid fingerprints that could create uneven cooking spots.
By following these preparation steps carefully, your gluten free chicken parmesan will develop that perfect golden crust while maintaining juicy, tender meat inside.
Cooking the Chicken to Golden Perfection

Image Source: cookmorphosis
After preparing your chicken cutlets, the cooking phase transforms them into golden-brown perfection. This critical stage determines whether your gluten free chicken parmesan will rival restaurant quality or fall short of expectations.
Pan-frying tips for a crispy crust
The secret to that coveted crispy exterior begins with proper pan-frying. Heat olive oil in a large skillet over medium-high heat until it’s shimmering but not smoking. This temperature is crucial—too low and your breading absorbs oil instead of crisping; too high and it burns before cooking through.
Cook the breaded chicken for approximately 2-3 minutes per side until both surfaces develop a rich golden-brown color. Remember, the chicken will finish cooking in the oven, so don’t worry if it’s not completely cooked through at this stage.
Between batches, add more olive oil as needed to maintain proper frying conditions. For consistent results, avoid overcrowding the pan—cook just one or two cutlets at a time, giving each piece ample space.
How to avoid soggy breading
Nobody enjoys soggy chicken parmesan. To maintain maximum crispiness, consider these professional techniques:
First, substitute some breadcrumbs with additional parmesan cheese. Unlike breadcrumbs, parmesan doesn’t absorb oil readily, creating a crunchier coating. Indeed, Japanese panko breadcrumbs naturally absorb less oil than other varieties, making them ideal for gluten free chicken parmesan.
Second, be strategic with sauce application. Rather than covering the chicken entirely, place sauce underneath the cutlets or use a minimal amount on top. For extra protection against sogginess, wait to add marinara until just before serving.
Lastly, pat raw chicken completely dry before breading and ensure your oil is properly heated before frying. These simple steps prevent moisture that leads to soggy results.
Baking and broiling for melted cheese
Once pan-fried to golden perfection, transfer your chicken to a baking dish. For optimal crispiness retention, spread a thin layer of marinara sauce on the bottom of the dish, then place chicken on top. Alternatively, place the chicken directly on a baking sheet and serve sauce on the side.
Top each cutlet with approximately 2-4 tablespoons of marinara sauce followed by mozzarella and remaining parmesan cheese. Bake at 400-425°F for 10-15 minutes until the cheese melts completely and becomes bubbly.
For that appetizing browned cheese finish, move your oven rack to the upper position and switch to broil for the final 2-3 minutes. Use a meat thermometer to confirm doneness—chicken should reach at least 165°F internally, though many chefs aim for 180°F for optimal texture.
Tips to Make It Better Than Restaurants
Elevating your gluten free chicken parmesan from good to restaurant-quality requires mastering a few professional techniques. These simple yet crucial steps make all the difference between an average weeknight dinner and a showstopping Italian classic.
Use a meat thermometer for perfect doneness
Relying on cooking times alone often leads to dry, overcooked chicken. Professional chefs always use meat thermometers because chicken breast is “pretty much the driest cut of meat out there” and becomes “tough, chalky sawdust when even slightly overcooked”.
For optimal results, insert an instant-read thermometer into the thickest part of the chicken. The USDA recommends an internal temperature of “at least 165°F (74°C)” for safety, although some chefs “usually aim for about 180°F” for improved texture in breaded cutlets.
Additionally, ensure your chicken pieces are “fairly uniform in thickness” to prevent some portions from overcooking while others reach the target temperature. This consistent thickness allows the entire cutlet to finish cooking simultaneously.
Avoid over-saucing the chicken
Perhaps the most critical restaurant secret: “Don’t drown the poor breaded and fried chicken in sauce and smother it in cheese. Too much of a good thing is too much”. Excessive sauce undermines all your hard work creating that crispy coating.
Instead, use “just enough sauce to cover the bottom of the dish lightly”. Alternatively, “spoon the tomato sauce over only the center of the chicken and leave the rest of it alone”. This technique maintains crispiness around the edges while providing flavor in every bite.
Certainly, you can also “place the sauce in a baking dish first, then the fried chicken cutlets on top of the sauce” or even “serve the tomato sauce on the side” for maximum crunch.
Let the chicken rest before serving
Allowing your breaded chicken to rest proves important at two stages. First, “before frying, let the breaded chicken sit on the counter for about 15 minutes to allow the coating to adhere to the chicken breast”. This resting period ensures your breading stays intact during cooking.
Afterwards, give the finished chicken parmesan a few minutes to rest before serving. This brief pause allows juices to redistribute throughout the meat, preventing that disappointing puddle of liquid on your plate when cutting into the chicken.
Above all, remember that gluten free chicken parmesan “is best enjoyed right away”. If reheating leftovers, “avoid using the microwave… as it’ll make the breadcrumb coating soggy”. Henceforth, use a 350°F oven with foil covering for 15-20 minutes, followed by 5 minutes under the broiler.
Make-Ahead, Storage, and Reheating Tips
Preparing gluten free chicken parmesan doesn’t always have to happen right before mealtime. With proper techniques, you can prepare components ahead of time, store leftovers efficiently, and reheat without sacrificing that perfect crispy texture.
How to prep cutlets in advance
Save valuable time by prepping your chicken cutlets ahead of schedule. You can bread and fry the chicken up to 3 days before serving. After cooking, allow the cutlets to cool completely to room temperature before refrigerating to prevent moisture buildup. Store them in a sealed glass container in the refrigerator.
For longer advance preparation, dredge the chicken in breadcrumbs, then refrigerate for up to 2 days before continuing with the recipe. This method works exceptionally well for busy weeknights when you need a quick-assembly meal.
Nonetheless, to maintain maximum crispiness when using make-ahead cutlets, sprinkle them lightly with lukewarm water before topping with sauce and cheese. This simple step helps revive the coating’s texture prior to baking.
Freezing and thawing instructions
Gluten free chicken parmesan freezes remarkably well. You can freeze the cutlets either after frying alone or after being fully prepared with sauce and cheese. For best results, ensure the chicken reaches at least 165°F before freezing.
To freeze properly:
- Allow chicken to cool completely to room temperature
- Place cutlets on a parchment-lined sheet pan and freeze for about two hours
- Once firm, transfer to a freezer-safe container or wrap individually in plastic wrap
- Label with name, date, and cooking instructions
- Store for up to 2-3 months
For thawing, the refrigerator method is safest—place frozen chicken in the refrigerator overnight. Despite taking longer, this method prevents bacterial growth while preserving texture.
Reheating without losing crispiness
The microwave is convenient but yields soggy results. Hence, these methods maintain crispiness:
Oven method: Preheat to 350°F, place chicken on a baking sheet, cover loosely with foil, and heat for 15-20 minutes until warmed through. Remove foil for the final 5 minutes to re-crisp the coating.
Air fryer technique: Undeniably the best option for maintaining crispiness—set to 350°F and reheat for 3-4 minutes until warmed and the cheese melts.
Stovetop approach: Use a skillet on medium heat for 5-6 minutes, flipping halfway through. Cover with a lid to help melt cheese without drying the chicken.
Throughout the reheating process, avoid high heat which can dry out the chicken or burn the coating.
Conclusion
Creating restaurant-quality gluten free chicken parmesan at home certainly requires attention to detail, but the results prove absolutely worth the effort. Throughout this guide, we’ve explored the secrets behind that perfect crispy crust—from selecting premium gluten-free panko breadcrumbs to mastering the three-step dredging process.
Remember, several key techniques truly elevate this dish above restaurant versions. First, pounding your chicken to uniform thickness ensures even cooking. Additionally, allowing breaded cutlets to rest before frying helps the coating adhere properly. Perhaps most importantly, avoiding excessive sauce preserves that coveted crispiness we work so hard to achieve.
Temperature control makes all the difference between mediocre and magnificent results. Therefore, investing in a quality meat thermometer eliminates guesswork and delivers perfectly cooked chicken every time. Likewise, proper oil temperature during frying creates that golden exterior without sogginess.
This gluten free chicken parmesan recipe offers tremendous flexibility. You can prepare components ahead of time, store leftovers effectively, or even freeze batches for future meals. Consequently, you’ll enjoy this Italian classic whenever cravings strike, without compromising on texture or flavor.
Armed with these professional techniques, your homemade gluten free chicken parmesan will undoubtedly impress family and friends. The combination of tender chicken, crispy coating, tangy sauce, and melted cheese creates a meal that rivals—and honestly surpasses—anything served in restaurants.
Most enthusiastically, I encourage you to make this recipe your own. Whether adjusting seasonings to suit your taste or experimenting with different cheese combinations, the foundation remains solid. Your kitchen will soon become your favorite Italian restaurant!
FAQs
Q1. What’s the key to achieving a crispy coating on gluten-free chicken parmesan?
The secret lies in the breading process. Use gluten-free panko breadcrumbs for extra crunch, and follow a three-step dredging method: coat in seasoned gluten-free flour, dip in egg wash, then press into the breadcrumb mixture. Allow the breaded chicken to rest before frying to help the coating adhere better.
Q2. How can I ensure my gluten-free chicken parmesan stays crispy and doesn’t get soggy?
To maintain crispiness, avoid over-saucing the chicken. Place a thin layer of sauce on the bottom of the baking dish and put the chicken on top, or spoon a small amount of sauce only in the center of each cutlet. You can also serve the sauce on the side for maximum crunch.
Q3. Can I make chicken parmesan without using any flour?
Yes, you can make a delicious gluten-free chicken parmesan without flour. Instead of traditional breading, try using ground almonds or other nut flours for the coating. This creates a grain-free crust that’s both flavorful and crispy when cooked.
Q4. What’s the best way to reheat leftover gluten-free chicken parmesan without losing its crispiness?
To maintain crispiness when reheating, avoid using the microwave. Instead, use an oven preheated to 350°F and heat the chicken for 15-20 minutes, covered loosely with foil. Remove the foil for the last 5 minutes to re-crisp the coating. An air fryer set to 350°F for 3-4 minutes is also an excellent option for crispy results.
Q5. How far in advance can I prepare gluten-free chicken parmesan?
You can bread and fry the chicken cutlets up to 3 days before serving. After cooking, let them cool completely before storing in a sealed container in the refrigerator. For longer preparation, you can dredge the chicken in breadcrumbs and refrigerate for up to 2 days before continuing with the recipe. This makes it convenient for quick assembly on busy weeknights.